Working with Seeed XIAO BLE Sense and PlatformIO IDE

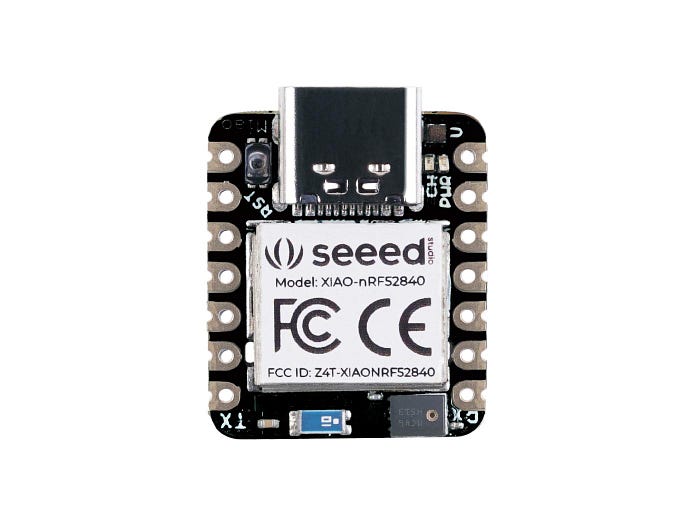
XIAO BLE Sense is a ridiculously small board packed with rich features such as Bluetooth Low Energy 5.0 powered by nRF52840 SoC, 6 degrees of freedom accelerometer and gyroscope, PDM microphone, battery charger, and last but not least, a 2 megabytes flash memory.
It was opened for pre-order in December 2021, so it was fairly new. It also means that there was no rich documentation at the moment, but the official documentation pages are there, and that’s great!
Before I go further, it’s better to check the official documentation first from Seeed Studio’s wiki pages.
Also, if you are looking for the official guide for working with this board on Arduino IDE, then this article is not meant for you. See the official documentation as such a case is explained there.
This also means that everything I describe here is based on my experience. It might and might not work for you. So, do it at your own risk!
Arduino IDE is such a nice software to work with, especially if you are experimenting with example code from libraries or getting started to work on something by testing each component on your prototype one by one. It is also great for a beginner who wants to learn programming microcontrollers, thanks to the simplicity of the overall process.
But, as the project or prototype grows more complex on each iteration, the codebase will also grow larger and it’s probably impossible to keep everything on a single sketch file. You probably use some libraries that you need to keep track of in order to keep everything working fine and not break a thing. The number of functions and/or classes probably increases as well. Sooner or later, you’ll hit the wall of limitation of what Arduino IDE can do for you.
PlatformIO IDE solves this problem. Combining the flexibility of PlatformIO core and Visual Studio Code, suddenly you have a full-blown IDE that has an IntelliSense feature so that you don’t have to remember every name of functions, classes, and stuff that you defined. You can also easily manage libraries so that they don’t conflict with your projects. Most importantly, you can customize the flags and configurations of the toolchain.
I will stop explaining what PlatformIO IDE is, if you haven’t tried it yet, I suggest you stop here, go read the docs, install and try it by yourself, and come back here. With that being said, I will assume that you have a fair amount of experience with PlatformIO from now on.
First thing first, make sure you have installed the nordicnrf52 platform. If you have not yet, open the PlatformIO terminal and type the following command
pio platform install nordicnrf52Then, go to the PlatformIO installation directory. The location is different for every operating system. On macOS, it is /User/username/.platformio and /home/username/.platformio on most Linux distributions. I don’t exactly remember the actual location for Windows, sorry about that!
Go to the platforms directory and make sure that the nordicnrf52 directory is in there. If it is not, check your installation for errors and consult the documentation and/or forum if necessary.
Create a file in the nordicnrf52/boards directory named xiaoblesense.json and copy-paste the content from the following snippet into that file
The file is based on the nano33ble.json, but the content itself is changed according to the files in the SEEED_XIAO_NRF52840_SENSE variant directory in the Arduino core provided by Seeed Studio. Save the file and move on.
Next, make sure that the Arduino framework based on mbed-os is installed on your PlatformIO IDE. Look at the packages directory under your PlatformIO installation directory. If you see the framework-arduino-mbed directory under the packages directory, then you can skip the following step. Otherwise, follow the following next step carefully.
Create a new PlatformIO project with the Arduino Nano33 BLE board on your IDE. PlatformIO will download the necessary software including the Arduino mbed core and the toolchain. Then check the framework-arduino-mbed directory one more time, if it is there then you can move to the next step. Otherwise, check for errors (as always) and consult the documentation or forum.
Now, download the Seeed Studio’s fork of Arduino mbed core that is used for the Arduino IDE from the following URL
https://files.seeedstudio.com/arduino/core/nRF52840/Seeed_XIAO_BLE_nRF52840_Sense261.tar.bz2Download and extract the archive, you will see the 2.6.1 directory. Copy the contents of that directory and paste it to the framework-arduino-mbed directory under your platforms directory inside the PlatformIO installation directory.
Assuming that you are using macOS or Linux, you can run the following commands to do that
wget -c https://files.seeedstudio.com/arduino/core/nRF52840/Seeed_XIAO_BLE_nRF52840_Sense261.tar.bz2tar -xjf Seeed_XIAO_BLE_nRF52840_Sense261.tar.bz2cp -r 2.6.1/* $HOME/.platformio/packages/framework-arduino-mbed
Now, back to the nordicnrf52 platform. Open the platform.py file in the nordicnrf52 directory under the platforms directory inside your PlatformIO installation directory.
Look for the code shown in the following snippet
if board in ("nano33ble", "nicla_sense_me"):
  self.packages["toolchain-gccarmnoneeabi"]["version"] = "~1.80201.0"
  self.frameworks["arduino"]["package"] = "framework-arduino-mbed"
  self.frameworks["arduino"]["script"] = "builder/frameworks/arduino/mbed-core/arduino-core-mbed.py"
Notice that the nano33ble board uses the framework-arduino-mbed package. We need to add the xiaoblesense board inside the tuple in that statement in order to tell the PlatformIO that our XIAO BLE Sense board requires the framework-arduino-mbed package. If we don’t do this, PlatformIO will use the default Arduino package for the nordicnrf52 platform.
if board in ("nano33ble", "nicla_sense_me", "xiaoblesense"):Also, add the following line to the if block
self.packages["tool-adafruit-nrfutil"]["optional"] = FalseUnlike Arduino Nano33 BLE, the Seeed XIAO BLE Sense board requires the adafruit-nrfutil CLI to create a DFU package and upload it to the board itself when you click the compile and/or upload button on the IDE. By adding the above line to the platform.py file, you tell PlatformIO to install that package if it is not installed.
Save the file when you’re done.
And that’s it! Go ahead and try creating a new PlatformIO project using the Seeed XIAO BLE Sense board, write your code in the main.ino or main.cpp file, and then compile your code!
After completing this tutorial, you should be able to do your creative stuff with the Seeed XIAO BLE Sense board using PlatformIO IDE as your IDE.
Feel free to leave your feedback in the response/reply section. Thanks for reading, and see you in the next post!
